
Craving a bold, intense coffee experience without investing in an expensive espresso machine? Meet the Moka Pot – the iconic Italian stove-top brewer that promises rich, strong, espresso-like coffee right in your kitchen. While technically not true espresso due to lower pressure, mastering the Moka Pot unlocks a uniquely satisfying and robust brew. Let’s explain how you can perfect your technique.
The Story Behind the Stove: A Quick Moka Pot History
Invented by Alfonso Bialetti in Italy in 1933, the Moka Pot (specifically the Bialetti Moka Express) revolutionized home coffee brewing. Inspired by observing a traditional laundry boiler, Bialetti created this simple yet ingenious aluminum device. It quickly became a symbol of Italian culture, found in nearly every household, and its distinctive octagonal design is recognized worldwide as a classic.
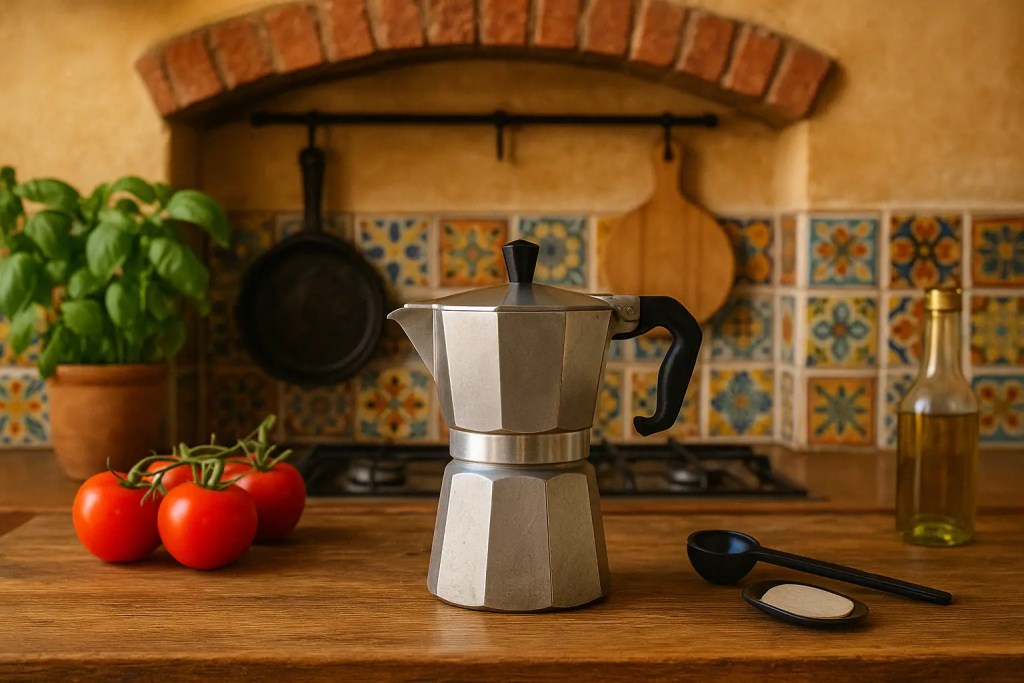
Moka Pot: a symbol of Italian culture
How Does This Moka Pot Work?
The Moka Pot’s brilliance lies in its simple, three-chamber design and use of steam pressure.
The Three-Chamber Symphony
- Bottom Chamber: Holds the water that will be heated.
- Middle Funnel Basket: Holds the ground coffee.
- Top Chamber: Collects the final brewed coffee.
Steam Power Explained
When you heat the Moka Pot on the stove, the water in the bottom chamber heats up, creating steam. This steam builds pressure (around 1-2 bars, much lower than an espresso machine’s 9+ bars), forcing the hot water up through the coffee grounds in the funnel basket. The brewed coffee then continues its journey up a spout and collects in the top chamber, ready to pour.
Choosing Your Moka Pot: Aluminum vs. Steel & Sizing
Before you brew, pick the right pot:
Classic Aluminum: The Traditional Choice
- Pros: The original material, excellent heat conductor (heats and cools quickly), lightweight, affordable, can develop a “seasoning” over time (though this is debated – might just be coffee oils).
- Cons: Porous, requires careful cleaning (no soap!), not compatible with induction stovetops, can potentially react with coffee acids over time if not cared for.
Sleek Stainless Steel: The Modern Option
- Pros: More durable, non-reactive (won’t affect flavor), easier to clean (often dishwasher safe), usually induction compatible.
- Cons: Heats up slower (but retains heat longer), typically more expensive.
Getting the Size Right
Moka Pots are sized in “cups,” but these refer to small, 1-2 ounce espresso-style servings, not standard American coffee mugs. A 3-cup Moka Pot makes roughly 3-4 ounces of strong coffee, while a 6-cup makes about 6-8 ounces. Choose based on how much concentrated coffee you want to make at once.
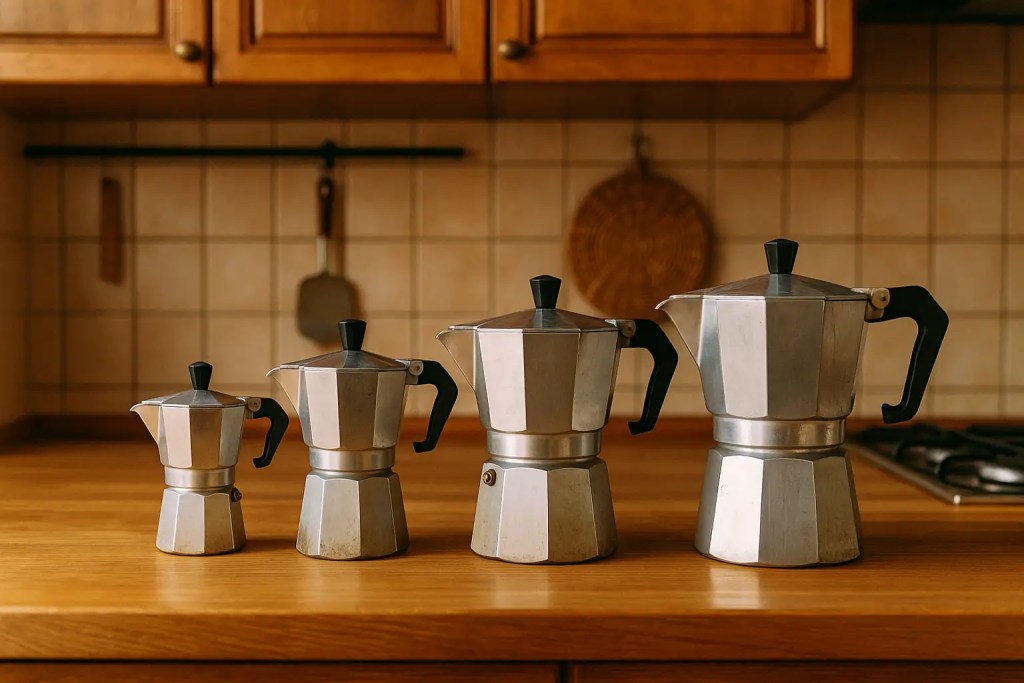
Moka Pot has various size alternatives
Gear Up: What You Need for Moka Pot Success
- Your Moka Pot: Clean and ready to go.
- Fresh Coffee Beans: Medium to dark roasts are traditional, but feel free to experiment.
- Quality Grinder: Essential for the right grind size consistency.
- Water: Filtered water is recommended for best taste and less scale buildup.
- Heat Source: Gas or electric stovetop (Induction only if your pot is compatible stainless steel).
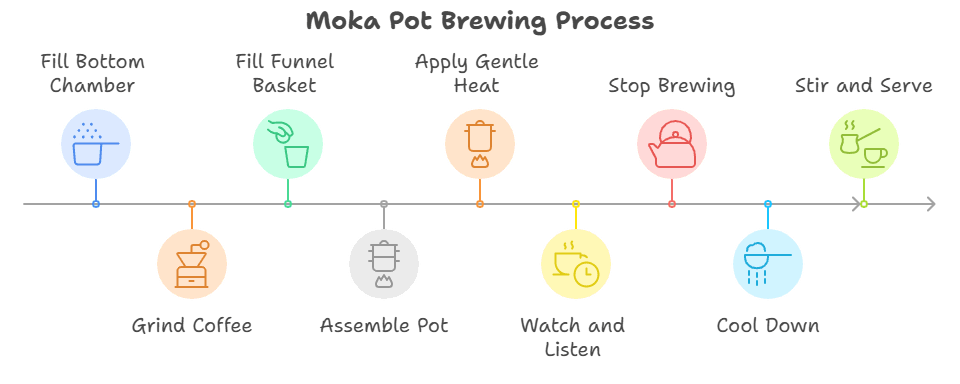
The Ultimate Moka Pot Brew Guide: Step-by-Step
This method focuses on preventing common pitfalls like bitterness.
Step 1: Hot Water Start!
Fill the bottom chamber with freshly boiled water just off the boil, filling it up to (but NOT covering) the safety valve. Why hot water? Starting with cold water means the pot sits on the heat longer, potentially cooking/scorching the coffee grounds before brewing even begins, leading to a bitter, metallic taste.
Step 2: Level, Don’t Tamp!
Grind your coffee to a medium-fine consistency: finer than drip but coarser than true espresso. Fill the funnel basket completely with grounds, leveling it off with your finger or the back of a knife. Crucially, DO NOT TAMP or press the grounds down. Tamping obstructs water flow, which can lead to excessive pressure buildup and uneven, bitter extraction. Wipe any loose grounds from the rim.
Step 3: Assemble Tightly
Place the filled funnel basket into the bottom chamber. Carefully screw the top chamber onto the base. Use a towel or potholder to grip the hot bottom chamber. Ensure it’s screwed on tightly to prevent leaks, but don’t overtighten to the point of straining.
Step 4: Gentle Heat is Your Friend
Place the Moka Pot on your stovetop over medium-low heat. If using gas, ensure the flame doesn’t extend beyond the base of the pot, especially avoiding the handle.
Step 5: Watch & Listen
Within a few minutes, coffee should start flowing gently into the top chamber. It should be a rich, steady stream, like thick honey initially.
Step 6: Stop the Sputter!
This is the most critical step for avoiding bitterness! As the brewing nears completion, the flow will lighten in color and eventually start to sputter, gurgle, and look bubbly/foamy. As soon as you hear this sputtering sound and see the color lighten significantly, remove the Moka Pot from the heat immediately. Letting it sputter extracts undesirable bitter compounds.
Step 7: Cool Down Quick (Optional but Recommended)
To rapidly stop the extraction process and prevent further cooking, carefully run the base (bottom chamber) of the Moka Pot under cold tap water for a few seconds.
Step 8: Stir & Serve Pronto!
Before pouring, give the coffee in the top chamber a quick stir with a spoon. This mixes the richer coffee brewed first with the lighter coffee brewed last for a more balanced cup. Serve immediately and enjoy.
Dodge the Disasters: Common Moka Pot Mistakes
- Using Cold Water: Leads to cooked/scorched grounds and bitterness. Fix: Use pre-heated water.
- Tamping Grounds: Obstructs flow, causes excessive pressure, uneven extraction. Fix: Level grounds only, never tamp.
- Wrong Grind Size: Too fine = clogs, bitterness; Too coarse = weak coffee. Fix: Aim for medium-fine, like table salt.
- Too High Heat: Brews too fast, burns coffee, potential metallic taste. Fix: Use medium-low heat.
- Brewing Too Long (Sputtering): Extracts bitter compounds. Fix: Remove from heat the moment it starts sputtering.
- Improper Cleaning: Old coffee oils become rancid and ruin flavor. Fix: Clean thoroughly after each use.
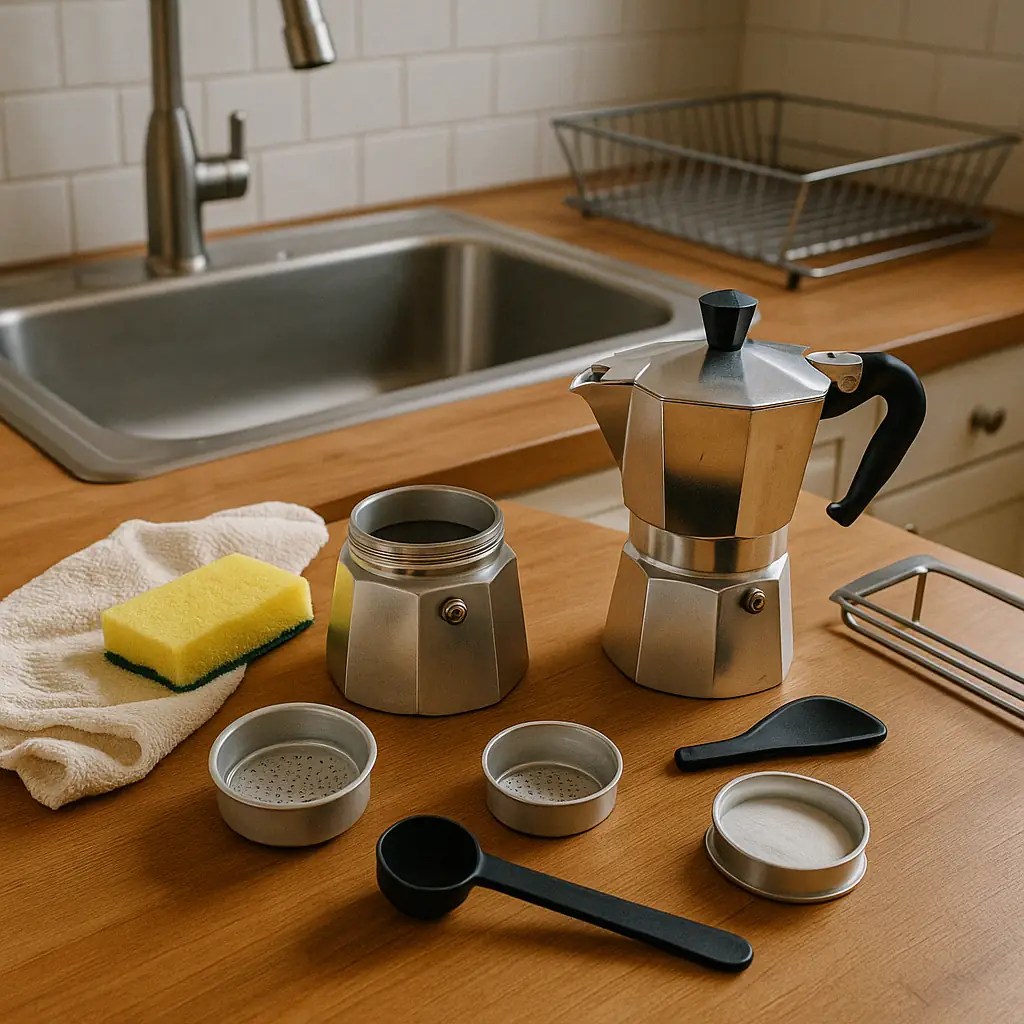
Keep it Gleaming: Moka Pot Cleaning & Care
- Let it Cool: Never handle a hot Moka Pot.
- Disassemble & Rinse: Unscrew the parts, discard the grounds (great for compost!). Rinse all parts thoroughly under hot running water.
- NO SOAP (on Aluminum): Avoid detergents and dishwashers, especially for aluminum pots. Soap strips the protective layer and can cause oxidation. Use only water and maybe a soft brush if needed. Stainless steel can usually handle soap.
- Dry Thoroughly: This is vital! Dry all parts completely with a towel before reassembling. Storing it damp can lead to corrosion or mold.
- Check Gasket/Filter: Occasionally check the rubber gasket and filter screen for wear or blockages.
Keeping your Moka Pot clean is the #1 thing to sustain the amazing brew taste
The Charm of Stovetop Strength
The Moka Pot offers a unique, satisfyingly strong brew steeped in tradition and style. It takes a little practice to master the heat control and timing, but the reward is a rich, aromatic cup that’s hard to beat for simplicity and flavor intensity without a fancy machine. Enjoy the process!

Leave a reply to Moka Pot vs. Espresso Machine: Which Brews Strong Coffee Your Way? Cancel reply